
Camera raw
A raw file is not a picture. It is what the sensor measured, before anybody decided what it should look like.
On a typical Bayer sensor, each photosite sits under a coloured filter — red, green or blue — so each one measures only a third of the colour. A raw file holds those single measurements, usually at twelve or fourteen bits each, along with a note of what the camera would have done with them. Turning that into a picture is called developing, and doing it yourself is the point of shooting raw.
Open one with File ▸ Import ▸ Camera raw..., or just open the file.
Why bother
The JPEG your camera makes is one interpretation of the raw data, decided in a fraction of a second by the camera, and then thrown away everything it did not use. Specifically, a JPEG is eight bits a channel with a tone curve, sharpening and noise reduction already baked in.
Working from the raw file instead means:
- Highlight headroom. Raw may retain detail that the camera’s JPEG rendering mapped to white. Recovery depends on what the sensor recorded; fully clipped sensor data remains missing.
- Flexible white balance. Choose channel gains before the final rendering, with more latitude than a JPEG. Large gains can still amplify noise or cause channel clipping.
- More tonal precision. Higher source precision can reduce banding during heavy adjustments. Bit depth describes precision, not dynamic range by itself.
The cost is time and file size.
The controls
Open
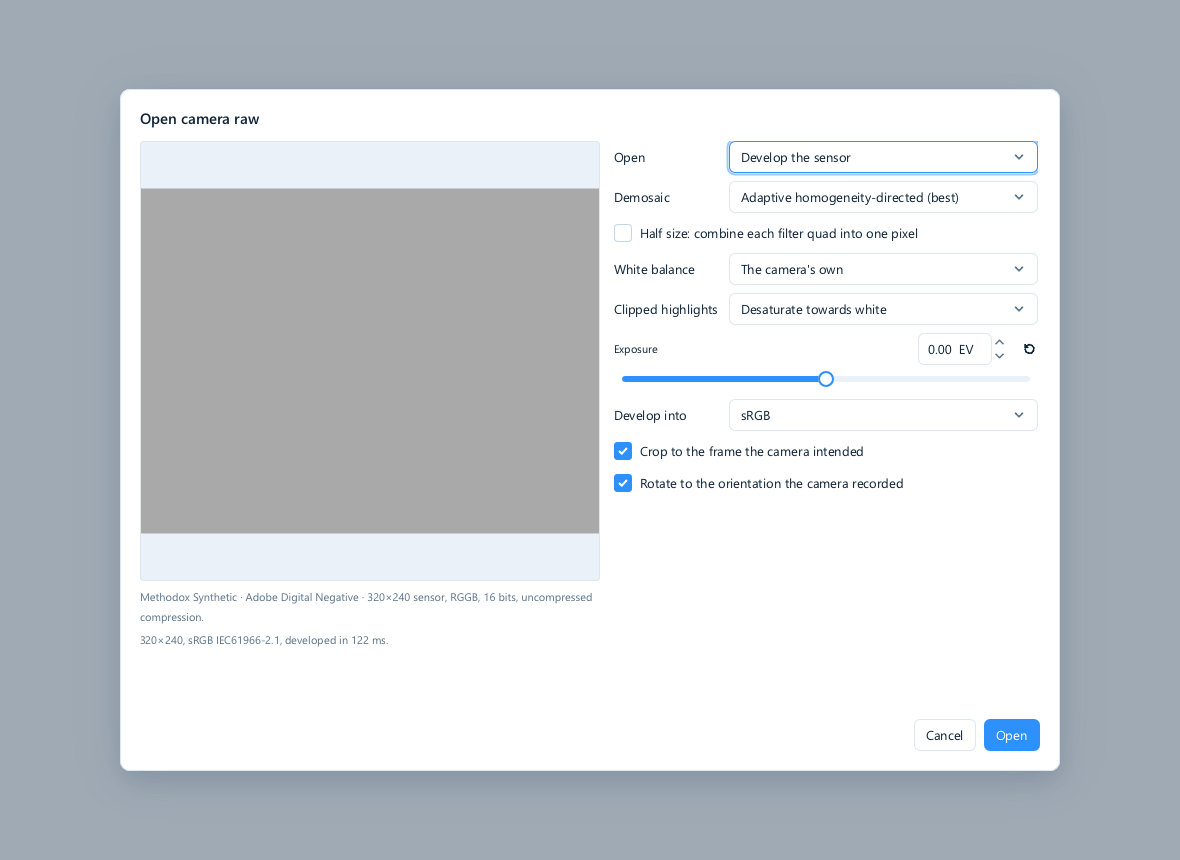
Whether to develop the sensor — the real thing — or to take the camera's own rendering that is stored inside the file. Develop the sensor unless you cannot.
Demosaic
Each sensor pixel measured one colour, so the other two have to be worked out from its neighbours. That is demosaicing, and the method decides how well fine detail and diagonal edges survive.
Adaptive homogeneity-directed is the default and a useful starting point. It looks at which direction the detail runs before interpolating, which is why diagonal edges come out clean rather than zippered.
Compare methods on fine detail at 100% zoom. Faster methods can be useful for previews and batch work.
Half size combines each group of four filtered pixels into one, giving a quarter-resolution picture very quickly with no demosaicing at all. It is useful for a fast look through a folder.
White balance
The camera's own uses what the camera recorded at the time, which is usually right and is always a sensible starting point.
Raw lets you choose white balance before the final rendering. Keep an eye on noise and channel clipping when making large changes.
Clipped highlights
Where a channel has hit its maximum, its true value is unknown — it might have been slightly over, or a great deal over. The setting decides what to do about it.
Desaturate towards white is the sensible default: a clipped area fades towards white rather than towards whatever colour the unclipped channels imply. Without it, a blown sky can go magenta or cyan, because one channel clipped and the others did not.
Exposure
Exposure is measured in stops: +1 doubles the linear signal and −1 halves it. Adjusting it during development uses the available sensor data, but lifting shadows also reveals noise. There is no universal safe number of stops; inspect the result at 100% zoom.
Develop into
Which colour space the developed picture arrives in.
- sRGB — for a picture destined for a screen, and the safe default.
- Adobe RGB — for print work.
- ProPhoto RGB — for heavy further editing, where you want the headroom.
The wider spaces preserve saturated colours the sensor caught and sRGB cannot hold. They also demand more care later, so pick sRGB unless the rest of your chain justifies otherwise. See Colour management.
Crop and rotate
Crop to the frame the camera intended trims the few rows and columns at the sensor's edge that are not part of the picture — masked pixels used for calibration.
Rotate to the orientation the camera recorded applies the orientation sensor's reading, so a portrait frame opens upright.
Leave both on unless you are inspecting the sensor data itself.
Reading the dialog's own report
Under the preview, the dialog says what it found: the camera, the format, the sensor size, the filter pattern, the bit depth and the compression. Under that, the size it developed to, the colour space and how long it took.
Methodox Synthetic · Adobe Digital Negative · 320×240 sensor, RGGB, 16 bits, uncompressed compression.
That is worth glancing at. It tells you whether the file is what you thought it was, and the bit depth tells you how much latitude you actually have.
When a file cannot be developed
Raw is not one format. It is a different format for every manufacturer, and several of them use proprietary compression that is not publicly documented.
If sensor decoding fails and a readable camera preview is available, the editor can use that rendering instead, disable development controls and explain the fallback. If neither sensor data nor a preview can be read, opening fails; not every raw file contains a usable preview.
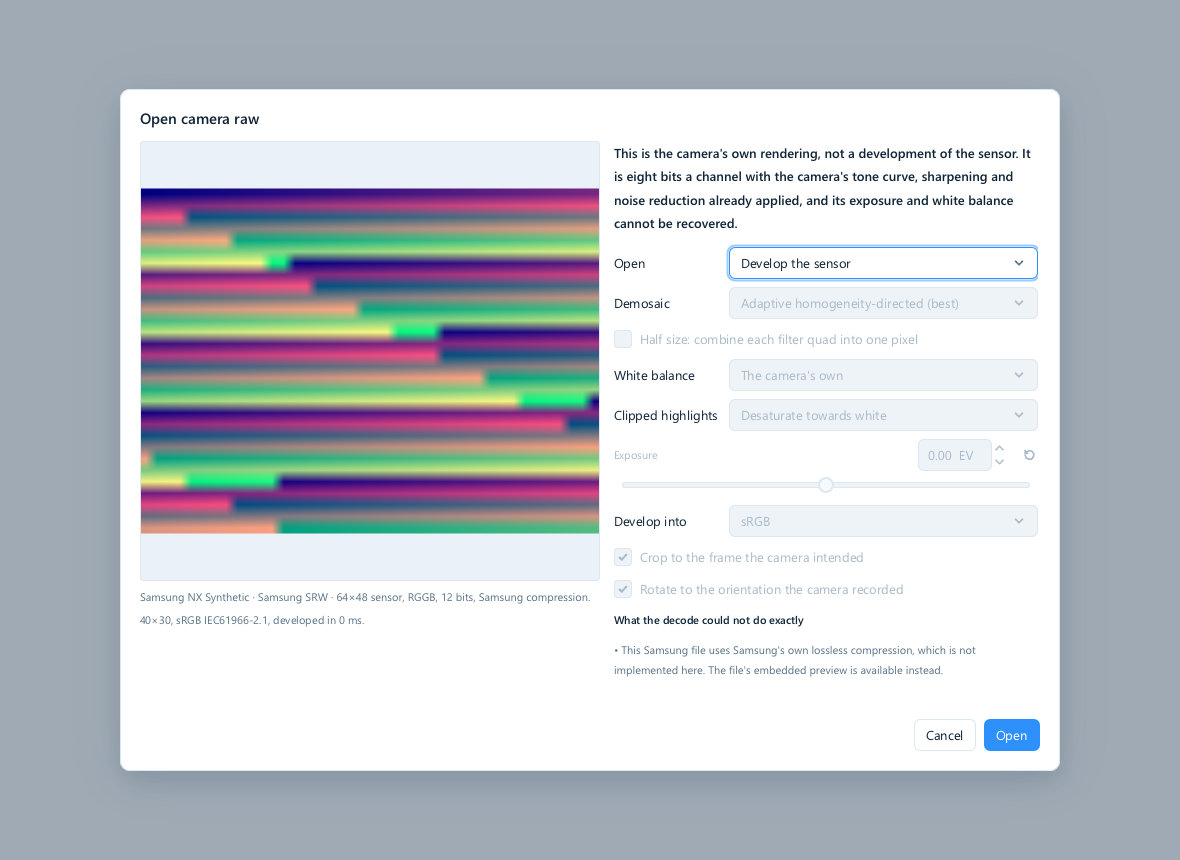
This is the camera's own rendering, not a development of the sensor. It is eight bits a channel with the camera's tone curve, sharpening and noise reduction already applied, and its exposure and white balance cannot be recovered.
And below that, under What the decode could not do exactly, the specific reason — for instance that a particular manufacturer's lossless compression is not implemented, so the embedded preview was used instead.
This matters because the two outcomes look similar and are not. A picture from the embedded preview is a JPEG in all but name: eight bits, already sharpened, already white-balanced, with the any highlights clipped by that rendering unavailable. Push it hard and it will break up where a real development would not.
If you see that message, the useful options are:
- Convert to DNG with a converter that supports your camera, then try opening the converted file. A DNG extension alone does not guarantee supported sensor compression.
- Use the camera maker's own software to develop it, and bring in the result.
- Accept the preview, if the picture only needs small changes.
A workable order
- Open the raw and set white balance — get the colour honest before judging anything else.
- Set exposure in the dialog rather than afterwards, while the full bit depth is available.
- Develop into sRGB unless you have a reason not to.
- Save as
.mieimmediately, so the developed picture and everything you do next are kept. - Correct with adjustment layers from there.
Raw files are read-only here. Developing one does not change it, and you can develop the same file again differently as many times as you like — which is the other reason to shoot raw.
Next
- Colour management — the space you develop into
- Adjustments — correcting the developed picture
- Opening and saving — what to save it as